

Guru Server can be run on Ubuntu 16.04 LTS with xbuntu-desktop as the UI. Private cloud is any virtualization technology including VirtualBox, VMWare, KVM, etc. Microsoft Azure is a cloud computing platform and infrastructure created by Microsoft for building, deploying, and managing applications and services through a global network of Microsoft-managed data centers. Any other public cloud service can also be used with similar OS requirements. The Guru Server application requires a running X session (UI) and must be launched by the startup process of the window manager (xfce in this example).
Recommended Azure virtual machine size: Standard_F2 or greater. High IOPS affects server startup and is not needed for normal use. OS storage can start with the default and expand as needed. Latency on the internet connection between the test floor and the Azure hosted guru system may affect the time it takes to display menu's but will not impact actual application loading, actual test times, or datalog processing.
Topics included below explain the procedure to change common settings in the OS. Any topic not listed below is covered by instructions available by searching the internet for "<topic> ubuntu". Guru Server is configured at the factory to integrate into the destination's network architecture, see
NTP required for accurate time base in GMT. When a guru client makes a connection to a guru server, and the GMT is different, the client will assume the Guru Server time for all timestamps.
Topics Covered: Deploy New Azure Resource, Server Administration, Remote Desktop, Network Settings, NTP Settings, Timezone, Mount Shared Network Drives (NFS), Shared Folders, Change OS Update Country, OS Update, Guru Server Launch Script, Identify Guru Server Version, Hardware Monitoring.
To Deploy New Private Cloud VM
See
Deploy New Azure Resource
Log into MS Azure portal: https://portal.azure.com/#create/hub
MS Azure Template:
1. New > Compute > Ubuntu Server 16.04 LTS > Create (Resource Manager)
2. Name: "<GuruServerHostName>", SSD, "guru", SSH or Password (IT policy), Resource Group: Create New = "guru", Location = "<ClosestAzureDatacenter>"
3. Size: A2 or higher
4. Settings: default
5. Summary: OK
6. Add Inbound Security Rules: Priority 300, GuruServer_in, Any Any TCP/50000 Allow, Priority 1010 RDP Any Any TCP/3389 Allow (SSH 22 is enabled by default), Priority 1020 NTP Any Any UPD/123
7. Add Outbound Security Rules: Priority 300, GuruServer_out, Any Any TCP/50000 Allow, Priority 1020 NTP Any Any UPD/123
Prerequisites:
1. Ubuntu 16.04 LTS or later installed
2. "guru" user account with auto-login privileges (this is set-up during the install process and is not in the scope of this document)
Install xubuntu-desktop, Oracle Java with Security and enable xrdp service - https://learn.microsoft.com/en-us/azure/virtual-machines/linux/use-remote-desktop?tabs=azure-cli
1. Create a new user for guru (follow platform guidelines)
2. ssh to public IP of host (or set up DNS A record and use the hostname) ssh guru@<hostname>
3. Add 32-bit support.
sudo dpkg --add-architecture i386
4. Add Oracle Java:
sudo apt-add-repository ppa:webupd8team/java
sudo apt-get update
sudo apt install oracle-java8-installer
5. Download and Install Java Cryptography Extension (JCE).
Required to create Guru Domain for user permissions on the Guru Server itself. Apps: Guru Groups Admin, User Password, etc.
echo oracle-java7-installer shared/accepted-oracle-license-v1-1 select true | sudo /usr/bin/debconf-set-selections
sudo apt install oracle-java8-unlimited-jce-policy
6. Download and Install core packages
sudo apt-get install xbuntu-desktop xrdp tcsh ntp
7. (Optional) Remove all non-essential Ubuntu packages (like open office) to save time performing updates and reduce HDD footprint.
8. Reboot the OS.
Install Guru Server
1. Copy the install package (tar.gz) and Guru ID (.zip) to the host's guru home directory (note: company specific <<guru_id>>.vfd may be packaged in the .tar.gz)
scp gSrv##-l-<<Company>>.tar.gz <<guru_id>>.zip guru@<hostname>
2. Unpack program (and guru ID):
tar -xvf gSrv##-l-<<Company>>.tar.gz
unzip <<guru-id>>.zip
3. Prepare Guru ID. Add guru user to 'disk' group and create loopback floppy device for guru key. GuruServer defines it's identity from this loopback device when the server starts.
sudo usermod -a -G disk guru
sudo mkdir /media/floppy
4. Mount GuruID loopback "floppy" drive manually:
sudo mount -t vfat -o loop /home/guru/<<guru-id>>.vfd /media/floppy
And at startup.
sudo nano /etc/fstab
append the following line to the end of the file:
/home/guru/<<guru-id>>.vfd /media/floppy vfat user,loop 0 0
then press CTRL+X, Y, enter to save the file.
5. Create Autostart entry with Settings > Session and Startup > Application Autostart tab > +Add button, with "Guru Server" name, any helpful description, and command = /home/guru/riApps/guruServer/guruServerStart.sh
note: shell script performs automatic updates (when manually imported into guru via .gzp) and will restart Guru if exited.
6. Restart the server and confirm Guru UI appears. Guru should now be accessible from Cassini ATE and Virtual Workstation (via tcp port 50000)
(Note: initial user account is "roos inst" and "cathy", please follow instruction to Initialize the Guru domain and establish users for normal use)
See Connect to Guru Server with Guru Address Book https://roos.com/docs/RBEH-8WDMHY
See Initialize Guru Domain & Create Users https://roos.com/docs/RBEH-97PUXM
7. Configure Guru Server settings by launching the Apps > Guru Address Book Admin > Check View Local Addresses > Select Title=<<guru_id>> > Edit Selected. Adjust the Remote Pipes to match the number of clients expected + 2 (for overhead), then press Save. Restart Guru by selecting System > Shutdown. It will automatically restart after a few moments.
Server Administration
There are 2 interfaces used to administer Guru Server. Graphically via Remote Desktop (rdp) or terminal session via SSH. Each system has a single public IP address assigned by MS Azure. Password is required for RDP access (vs SSH which can use a cert).
Default username/password = guru/****UNIQUE****
(note: SSH prevents "root" logon, use "guru" then prepend commands with "sudo")
Best security practice is to use both SSH cert to create a local tunnel for the RDP client as well as a sufficiently complex password.
Remote Desktop
The the ONLY way to interact directly with GURU is via a GUI from remote terminal (RDP). The command line interface (terminal or ssh) can only be used for OS activities. Command line interface can be opened via the local and remote terminals, however SSH is recommended for best remote admin performance.
Use a Remote Desktop client to connect to "<hostname>:3389" and enter the user credentials to access GUI.

Since many of the configuration changes do not have a graphical user interface. Use "sudo mousepad /path/to/file" from a terminal to open a graphical based text editor.
From a command line: "ssh guru@<hostname>" and follow "from Terminal" instructions (where available).
Network Settings (IP Address, DNS, host name, etc.)
"NetworkManager" is used to connect to LAN. LAN is managed by company IT. See also Xubuntu Documenation - Network Connections.
From Desktop:
- Click on the NetworkManager icon in the task bar. Click "Edit" to change settings, "Information" for IP address information. Follow the dialog prompts to make any changes.
From Terminal:
- "sudo nano /etc/NetworkManager/system-connections/LAN"
For Static IP: edit "[ipv4]" to include "method=manual" and "address1=10.0.0.1/24,10.0.0.1" (address/net, default route)
Proxy Setting
Collect your network's proxy information. There may be differences between HTTP, HTTPs and FTP. replace localaddrses with the IP address of your machine, and .localdomain.com with your domain's global DNS.
From Terminal: "sudo nano /etc/environment", add the following lines. Note: You must duplicate upper case and lower case because some programs only look for one or the other.
- http_proxy=http://myproxy.server.com:8080/
https_proxy=http://myproxy.server.com:8080/
ftp_proxy=http://myproxy.server.com:8080/
no_proxy="localhost,127.0.0.1,localaddress,.localdomain.com"
HTTP_PROXY=http://myproxy.server.com:8080/
HTTPS_PROXY=http://myproxy.server.com:8080/
FTP_PROXY=http://myproxy.server.com:8080/
NO_PROXY="localhost,127.0.0.1,localaddress,.localdomain.com"
Some newer GTK3 programs rely on the Gnome settings instead. To make sure they are covered, open a terminal and paste the modified lines below, one at a time:
- gsettings set org.gnome.system.proxy mode 'manual'
gsettings set org.gnome.system.proxy.http host 'myproxy.server.com'
gsettings set org.gnome.system.proxy.http port 8080
- Acquire::http::proxy "http://myproxy.server.com:8080/";
Acquire::ftp::proxy "ftp://myproxy.server.com:8080/";
Acquire::https::proxy "https://myproxy.server.com:8080/";
NTP Setting
From Terminal: "sudo nano /etc/ntp.conf", update "server <hostname>" where <hostname> is the IP address or host name of the local NTP server..
See also Ubuntu Official Documentation - Time Synchronization with NTP.
Timezone
First click "Unlock", enter password, then click on the "Time zone:" field to select the appropriate time zone.
See also Ubuntu Community - UbuntuTime.
Mount Shared Network Drives (NFS or SMB)
IMPORTANT: /RiGuru and /RiApps should NOT be hosted on a remote NSF server without proper tuning.
From Terminal: "sudo nano /etc/fstab"
- Then add a line with this general syntax to connect to NFS server.
example.hostname.com:/ubuntu /local/ubuntu nfs rsize=8192,wsize=8192,timeo=14,intr
Then add a line with this general syntax to connect to SABMA or Windows server.
//myserver_ip_address/myshare /media/samba_share cifs credentials=/etc/samba/user,noexec 0 0
Shared Folders (Samba)
From Terminal: ""sudo nano /etc/samba/smb.conf" Modify [global] or [Public] with changes.
See also Ubuntu Official Documentation - Samba
Change Software Update Country
NOTICE: Regular software updates are NOT recommended. You SHOULD apply urgent security updates regularly or when requested by Roos Support.
Software updates are configured for United States. To improve update performance, change "Download From" to your country name.
From the Updates tab, uncheck "Recommended" and "Unsupported" from the Updates tab to only include important security updates.
See also Xubuntu - Managing installed applications
OS Software Update
Notice: Security updates should be applied, unless instructed by Roos Support, regular updates do not need to be applied for reliable functionality.
With a internet connection to port 80 & 443 (https), software update dialog will appear based on the frequency it is set to check.
Update can be run anytime:
See also Xubuntu - Managing installed applications
Guru Server Launch Script
Guru Server requires a GUI (X) session to be running, so the "guru" user is set to autologin and Guru Server is set to start from the Xfce Application Autostart settings. DO NOT change these settings unless instructed by Roos Instruments. This information is provided for disaster recovery purposes only.
Guru Server is launched from the
Select "RI Guru Enterprise Server (Roos Instruments Guru Server)" and press Edit. Command = "/home/guru/RiApps/guruServer/guruServerStart.sh"
"guru" user is set to automatically log on via configured file "/etc/lightdm/lightdm.conf" under the "[SeatDefaults]" section.
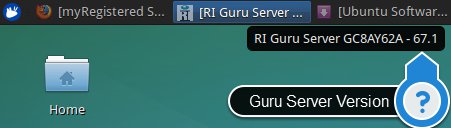
Identify Guru Server Version
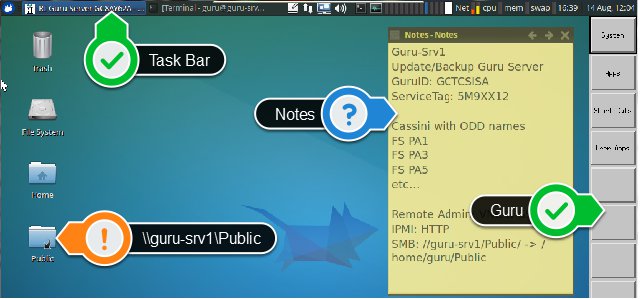
Identify the version of Guru Server that is currently running by hovering over the "[RI Guru Server..." task along the Task Bar.
Determine the OS version with "lsb_release -a" command.